I have scanned all my slides into TIFF images. Now, I want to improve the color curves a bit and convert them into shareable JPEG files.
Marking the files
As a first measure, I wanted to designate my files as scans, not actual pictures. The easiest and most obvious step to do this is, to give them a suitable name. I added a “diascan” postfix to the filenames, so xyz.tif becomes xyz.diascan.tif:
#Rename all TIFF files with a postfix "diascan" (before the .TIF suffix)
find . -iname "*.tif" -not -path "*@eaDir*" -exec bash -c 'mv "$1" "${1%.tif}".diascan.tif' - '{}' \;
Later, I will also add EXIF tags on the output.
Converting to JPEG, with improving visual quality
Now for the actual conversion, I chose to use the widely known ImageMagick tool. It’s already part of major linux distros:
#Test availability
convert -version
First, I want to resize any images that have been scanned 3600 dpi (Because I have found that my slides do not have that high of a resolution anyway). Here’s a simple recursive shell script for that:
#!/bin/bash
#find all TIFF files larger than 50mb
find . -iname "*.tif" -size +50M -not -path "*@eaDir*" | while read f
do
    echo "File found: $f"
    #in-place resize to just half the size
    mogrify -resize 50% "$f"
done
To improve the image quality, I used two image operators:
- normalize to get rid of the wasted levels at both the lower and the higher end of the images
- sigmoidal-contrast to improve the resolution in the shadows, which are usually a bit too dark in my pictures
#!/bin/bash
find . -iname "*.tif" -not -path "*@eaDir*" | while read f
do
    echo "File found: $f"
    #normalize (contrast-stretch) the intensity range
    #improve contrast in the dark areas a bit
    #convert to jpg, with default quality
    convert "$f" -normalize +sigmoidal-contrast 4x100% "$f.enhanced.jpg"
done
The above as a one-liner, if you prefer:
for f in `find -iname "*.tif" -not -path "*@eaDir*"`; do convert "$f" -normalize +sigmoidal-contrast 4x100% "$f.enhanced.jpg"; done
Here’s how this looks like:
-

Original scan -
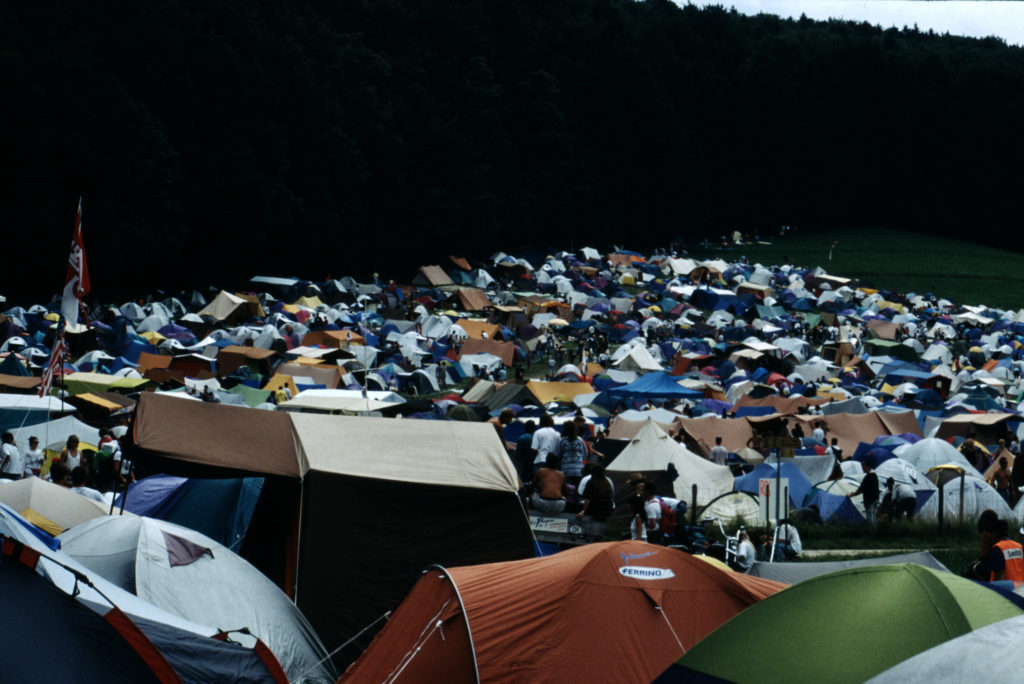
Normalized -
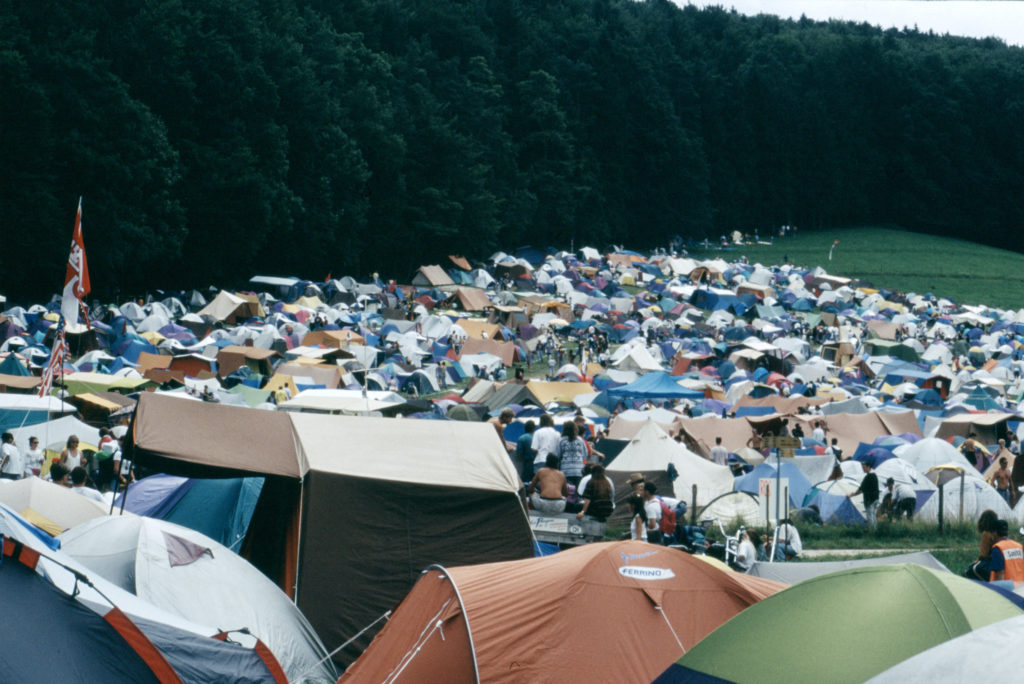
Normalized and Contrast-Improved in the shadows
Adding EXIF tags
Tag for dia scan
I have already used exiftool for tagging WhatsApp images. Here, the process is even simpler:
# For all images
# Add a 'diascan' keyword, but only if:
# The keywords tag does not exist at all or
# The keywords do not contain 'diascan' (case-insensitive)
exiftool -if 'not defined $Keywords or $Keywords!~/diascan/i' '-Keywords+=diascan' -overwrite_original -v -r -i '@eaDir' -ext JPG -ext TIF . -fast2
Setting the date from the directory name, Artist and description
# Use the date/time information from the directory (e.g. YYYYMMDD). Note: This works by applying some cleverness by exiftool.
exiftool '-alldates<${directory}:01:01 00:00:00' -overwrite_original -v -r -i '@eaDir' -ext JPG -ext TIF . -fast2

# Set the artist
exiftool '-artist=qrys.ch' -overwrite_original -v -r -i '@eaDir' -ext JPG -ext TIF . -fast2

# Use the directory name as description
exiftool '-imagedescription<${directory;s/.+\/\b|\///g}' -overwrite_original -v -r -i '@eaDir' -ext JPG -ext TIF . -fast2

# Date/time and description from directory, artist in one command
exiftool '-alldates<${directory}:01:01 00:00:00' '-artist=qrys.ch' '-imagedescription<${directory;s/.+\/\b|\///g}' -overwrite_original -v -r -i '@eaDir' -ext JPG -ext TIF . -fast2
Et voilà, good looking, tagged jpeg images ready to show or distribute!