
This should be a minimal guide to get you started with a VueJs PWA (Progressive Web App) from scratch. To learn more about PWA, you may listen to the PWA episode on the Coding Blocks podcast and read A roundup of infos about the new version of Vue.js on Made With VueJs
Node.js and npm
Node, the JavaScript runtime, and its package manager, npm, are not installed by default on Ubuntu 20.04. You can get them via apt, the Advanced Package Tool used by Ubuntu:
sudo apt update
sudo apt install nodejs
node -v
sudo apt install npm
npm -v
Note: Node is also available on the snapcraft store. if you like to get it from there
Vue/Vue CLI
Vue, Version 3, has still the “@next” distribution tag (at the time being, May 2021), so you need to find the VueJs V3 documentation here. While not recommended for absolute beginners, the Vue CLI (Vue Command Line Interface) is the simplest way to create a new project setup:
# Globally install Vue CLI
sudo npm install -global @vue/cli
# Create a new project, using Vue CLI's scaffolding:
vue create my-project
# Choose the "Manually select features" option
# Select:
# - Choose Vue Version (Select 3)
# - Typescript
# - PWA
# - ...others as you like
First start
After the project is created, run it for the first time:
cd my-project
npm run serve
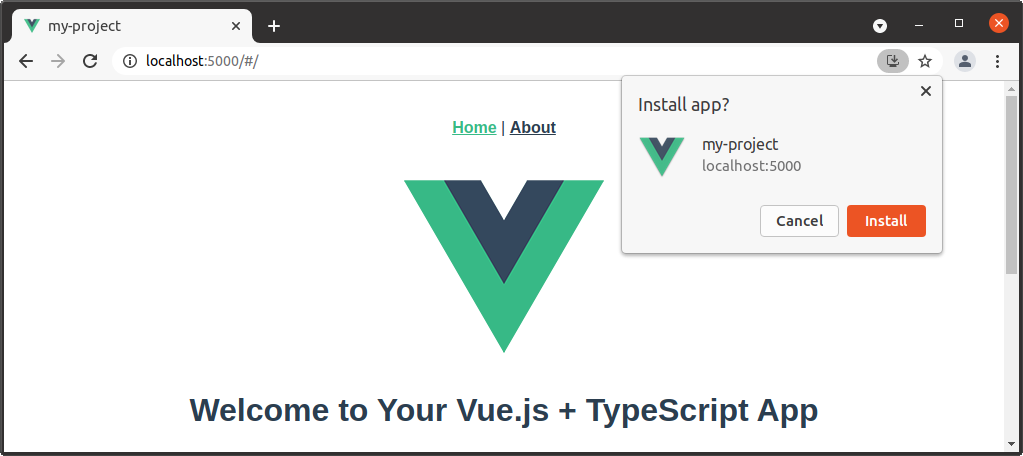
Then browse to http://localhost:8080/ You will see a simple summary page, reporting the state of your app. When using the Google Chrome browser, you can use the built-in DevTools (F12) to see detailed information about the created web app. The Lighthouse tab even shows a report with a PWA score.

Make it installable (from localhost)
To actually have an installable PWA, you must serve the created distribution, for example with the serve npm module, as described in the Deployment section of the CLI documentation.
# build into the dist folder
npm run build
# install the serve npm module globally (possibly requires admin privileges)
npm install -global serve
# serve the app's dist folder as static files
serve -s dist
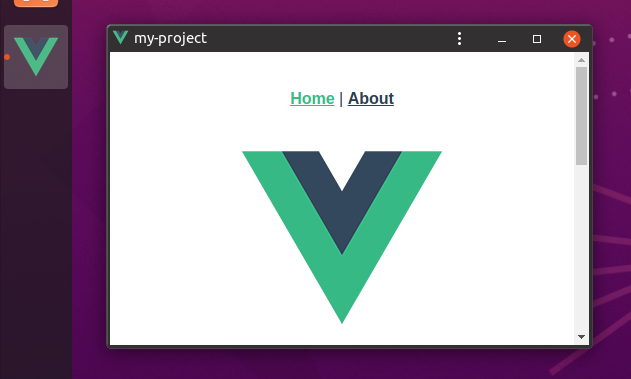
You can now pin the PWA to the Ubuntu favourites bar, and load it from there, even when the local web server is not running anymore:
Using this, I have created these PWAs already
- SunScreen, using the screen as a light source
- tic (metronome), a metronome app
- Replayer Web App, the rehearsal player
Optionally recommended Tools and Visual Studio Code Extensions
- Material Icon Theme (Material Design Icons for Visual Studio Code) by Philipp Kief
- Debugger for Chrome (msjsdiag.debugger-for-chrome) by Microsoft
- Prettier – Code formatter (esbenp.prettier-vscode)
- Vetur (octref.vetur)
For the workspace, I use the following settings
"settings": {
    "prettier.singleQuote": true,
    "prettier.tabWidth": 4,
    "editor.formatOnSave": true
}
Also, get the Devtools extension for your browser of choice.